What is the easiest way for a complete beginner to start editing photos in Adobe Lightroom in 2026?
Quick answer: The easiest way to start editing in Adobe Lightroom as a beginner is to follow a four-step workflow: import your photos, organize them into a collection, make basic adjustments in the Develop module (exposure, white balance, and crop), then export a JPEG copy. Lightroom never overwrites your originals, so every edit is completely reversible — making it a forgiving first editing app for beginners.
New to Lightroom? Follow this step-by-step beginner tutorial to import, edit, and export your first photo on desktop, mobile, or web — with screenshots and tips.
Key Takeaways
- Lightroom is non-destructive: your original photos are never altered or deleted.
- The catalog stores all your edits as instructions, not baked into the image file.
- Choose Lightroom (cloud) for cross-device editing or Lightroom Classic for local, desktop-first control.
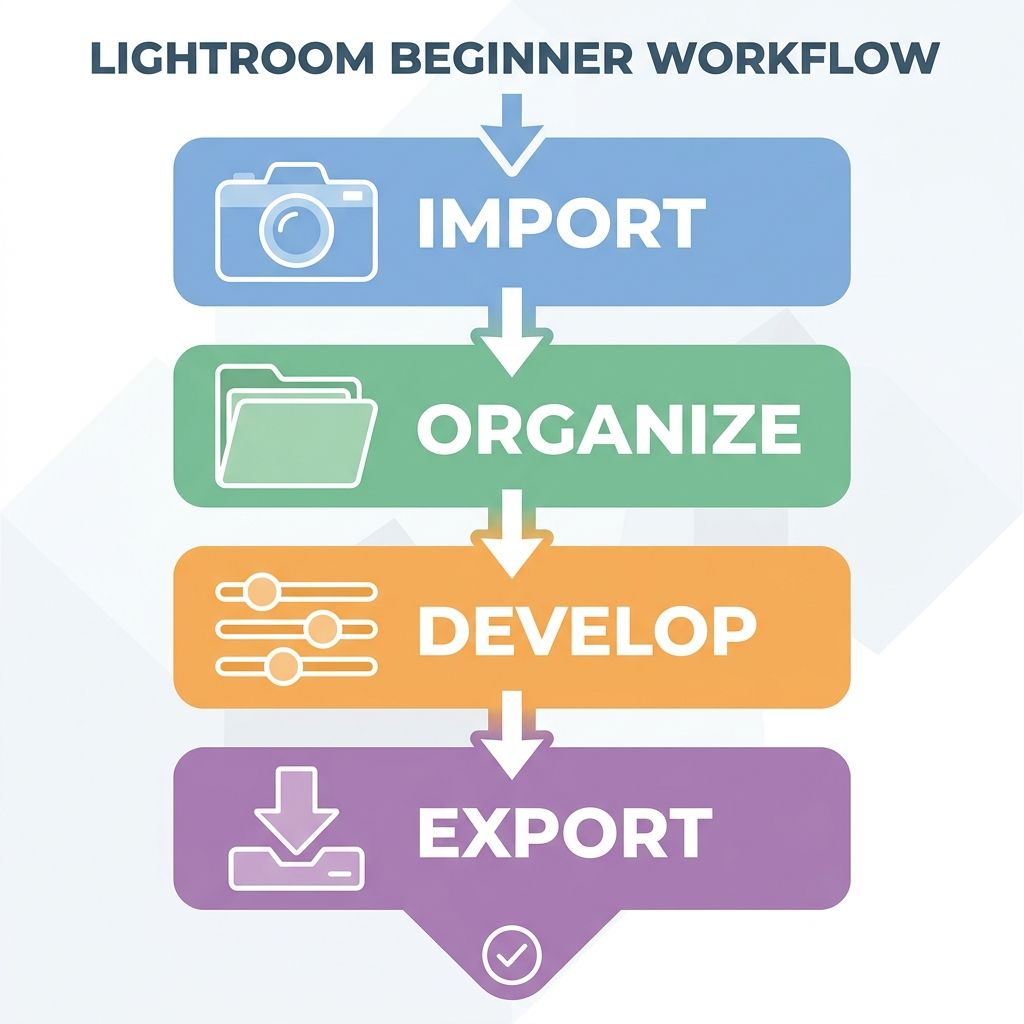
- The beginner workflow is four steps: Import → Organize → Develop → Export.
- Exposure, White Balance, and Crop are the three most impactful beginner adjustments.
- AI tools like Denoise and Remove Object can fix common issues in one click.
- Export photos as JPEG at quality 85 and sRGB color space for sharing on web or social media.
What Is Adobe Lightroom? A Plain-Language Overview
!Infographic showing the four-step Lightroom beginner workflow: Import, Organize, Develop, Export
Here's the reality: Lightroom is a photo editor and organizer built around one big idea — your original files stay untouched, no matter what you do to them. Adobe Lightroom is a non-destructive photo editor for beginners and pros, meaning every slider you drag is saved as an instruction in a database called the catalog. The image on your hard drive is never changed; the edit only "bakes in" when you export a copy.
That single concept is what makes Lightroom forgiving. You can crank exposure to +5, change your mind a week later, hit reset, and you're back to the original. No "Save As" panic. No layered backup folders.
💡 Your originals are always safe > Lightroom stores every edit as a set of instructions in the catalog. The RAW or JPEG file sitting in your Pictures folder is never overwritten. If you ever want the untouched version back, just hit Reset on the Develop panel.
How Non-Destructive Editing Works
- Lightroom writes edit instructions to the catalog database, not to the image file itself.
- The original RAW or JPEG on disk is never modified. Think of your edits as a recipe that only gets cooked when you export.
- Your original photos are the ingredients. The catalog is the recipe book. The export is the finished meal.
- You can undo any edit at any time — even months later — by resetting the sliders.
What the Lightroom Catalog Actually Is
The catalog is a database file (.lrcat in Classic, or a synced cloud database in Lightroom cloud) that lives on your computer. It stores previews, keywords, star ratings, flags, and every slider position you've ever set.
- It stores previews, keywords, star ratings, and every slider adjustment you've made.
- Losing the catalog means losing your edit history, but not your original photos.
- Back up the catalog regularly — Lightroom Classic prompts you on exit, and cloud Lightroom backs up automatically when synced.
- For the technical breakdown, see Adobe's own catalog documentation.
Lightroom vs Lightroom Classic: Which Should a Beginner Use?
This is where most beginners get tripped up before they even open the app. Adobe sells two products with nearly identical names, and they behave differently.
!Side-by-side comparison infographic of Lightroom cloud and Lightroom Classic highlighting storage, sync, interface, and best-for audience
Lightroom vs Lightroom Classic at a Glance
| Feature | Lightroom (Cloud) | Lightroom Classic |
|---|---|---|
| Storage location | Cloud-based (synced across devices) | Local (your hard drive) |
| Cross-device sync | Full sync — desktop, mobile, web | Limited (smart previews only) |
| Interface style | Simplified, single-window | Full module-based workflow |
| Best for | Mobile-first or multi-device editors | Desktop power users with large local libraries |
| Catalog type | Auto-synced cloud database | Manual local `.lrcat` file |
For full feature parity details, check Adobe's official Lightroom vs Lightroom Classic comparison.
💡 Our recommendation for most beginners > Start with Lightroom (cloud). The interface is cleaner, edits sync to your phone automatically, and you'll spend less time fighting file paths. Everything in this tutorial uses Lightroom (cloud) unless noted. If you're a desktop-only photographer with thousands of existing files, Classic still wins — but most beginners don't need that horsepower yet.
Before You Start: Getting Lightroom Installed
You don't need to commit financially before you try this. Adobe offers a free trial of Lightroom, and the mobile app is free to download with a limited feature set.
Here's how to get up and running:
- Visit adobe.com and create a free Adobe account.
- Choose a plan or start the free trial (length and pricing change, so check Adobe's page directly).
- Download the Creative Cloud desktop app — it's the installer hub for all Adobe apps.
- Open Creative Cloud and click Install next to Lightroom.
Pre-Launch Checklist
- Adobe account created (free at adobe.com)
- Lightroom plan selected or free trial started (check adobe.com for current pricing)
- Creative Cloud desktop app installed
- Lightroom installed via Creative Cloud
- A few photos on your device ready to import
- System meets Adobe's minimum requirements
⚠️ Check system requirements > Adobe updates OS and hardware requirements with every major release. If you're on older hardware or an older macOS/Windows version, verify against Adobe's system requirements page before you install. Lightroom AI features in particular need recent hardware to run smoothly.
Choosing the Right Plan
- I'm not going to quote prices here because Adobe changes them often. Check Adobe's plans page for the current numbers.
- Adobe's Photography Plan typically bundles Lightroom + Photoshop + cloud storage. If that bundle is still offered when you read this, it's usually the best value for beginners who'll eventually want Photoshop too.
- A free trial exists. Adobe occasionally changes the trial length, so confirm on the plans page.
- Lightroom mobile is free to download with limited features. Full functionality (especially cloud sync and premium tools) requires an active subscription.
Lightroom Glossary: 10 Terms Every Beginner Should Know
Bookmark this. When you hit a word that makes no sense later, this is where you come back.
| Term | What It Means in Plain Language |
|---|---|
| Catalog | The database that stores all your edits, ratings, and previews. Your photos aren't *in* it — they're tracked by it. |
| Library Module | The view where you import, organize, rate, and sort your photos. |
| Develop Module | The view where you actually edit photos using sliders and tools. |
| Preset | A saved set of slider positions you can apply in one click. |
| Histogram | A graph showing the spread of dark to light tones in your photo. |
| Mask | A selection that limits edits to a specific area, like the sky or your subject. |
| Collection | A virtual album that groups photos without moving the files on disk. |
| Export | The act of creating a finished copy (JPEG, TIFF, etc.) with all edits applied. |
| RAW File | An unprocessed image straight from your camera's sensor, with maximum editing flexibility. |
| White Balance | The setting that controls whether your photo looks warm (orange) or cool (blue). |
Step 1 — Import: Bringing Your Photos Into Lightroom
Importing isn't moving your photos into Lightroom. It's telling Lightroom where to find them and adding them to the catalog. That distinction matters.
!Annotated screenshot of the Lightroom Import dialog showing the Copy option, source panel, destination panel, and Import button with numbered callout labels
Here's the quick version:
- Open the Import dialog (File > Import Photos, or
Ctrl/Cmd+Shift+I). - Choose your source (memory card or folder) in the left panel.
- Select Copy at the top of the screen.
- Choose a destination folder on the right panel.
- Optionally add keywords or apply a preset on import.
- Click Import.
⚠️ Always use 'Copy', not 'Move' > The Move option deletes photos from your memory card or source folder after copying. If anything goes wrong during the transfer — power outage, disconnected card, full disk — those files are gone. Always choose Copy until you've verified the files imported cleanly and you have a backup.
Importing from a Memory Card
- Connect your card reader or camera via USB.
- Lightroom usually pops the Import dialog open automatically. If it doesn't, go to File > Import Photos and Video.
- The left panel shows the source (your card). The right panel shows the destination on your computer.
- At the top of the screen, click Copy. This copies files to your hard drive without touching the originals on the card.
- Pick a destination folder. I recommend
Pictures/Lightroom/[Year]/[Date or Event]as a starting structure. - Click Import. Lightroom copies the files and builds previews. Larger batches take longer — go grab coffee.
Importing Photos Already on Your Computer
- Go to File > Import Photos and Video.
- In the source panel, navigate to the folder containing your photos.
- Choose Add instead of Copy. This tells Lightroom to reference the files in place without duplicating them.
- Select the photos you want and click Import.
If those files are RAW and you've never shot RAW before, it's worth understanding why the format matters — RAW gives you dramatically more recovery latitude than JPEG.
Step 2 — Organize: Collections and Basic Library Management
You can ignore most of the Library module for now. Two tools matter for beginners: Collections and star ratings.
💡 Collections don't move your files > Adding a photo to a Collection is like tagging it. The actual file stays exactly where it is on disk. Collections are virtual groupings that live inside the catalog — which means one photo can sit in five different Collections without any file duplication.
Creating Your First Collection
- In the Library module, click the + next to Collections in the left panel.
- Choose Create Collection and give it a descriptive name like "Family Trip 2026" or "Portfolio Picks."
- Drag photos from the grid into the Collection, or check Include selected photos when you create it.
- Use Collections to group shoots, client work, or curated portfolios without reorganizing your hard drive.
Rating and Flagging Your Best Shots
- Press 1–5 to assign a star rating to the selected photo.
- Press P to flag a photo as a Pick. Press X to mark it as Rejected.
- Use the Filter bar at the top of the grid to show only 4-star and above.
- Cull before you edit. You'll save hours by only developing photos worth keeping.
Step 3 — Develop: Making Your First Edits
This is where Lightroom earns its keep. The Develop module is where you crop, fix exposure, balance color, and sharpen — all non-destructively. Press D from anywhere in Lightroom to jump into it.
For a typical beginner edit, you only need five tools:
- Crop — fix composition and straighten horizons.
- Exposure — set the overall brightness.
- White Balance — correct or stylize color temperature.
- Contrast / Highlights / Shadows — recover detail in bright and dark areas.
- Sharpening — add bite for screen or print.
Beginner Develop Checklist
- Crop and straighten the composition (press R)
- Set Exposure so the image looks naturally lit
- Adjust White Balance for accurate or creative color temperature
- Pull down Highlights and lift Shadows to recover detail
- Fine-tune Whites and Blacks for full tonal range
- Boost Vibrance slightly for color pop without oversaturation
- Apply light Sharpening in the Detail panel (Amount 40–60 for screen)
!Annotated close-up of the Lightroom Develop module Basic panel showing Exposure, Contrast, Highlights, Shadows, Whites, Blacks, and White Balance sliders with labels
💡 Watch your histogram > The histogram in the top right shows the spread of tones from black (left) to white (right). If you see triangles light up in the corners, you've got clipping — pure black shadows or blown-out highlights with no recoverable detail. Aim to keep the histogram contained within the frame for a balanced exposure.
Cropping and Straightening
- Press R or click the Crop Overlay tool in the toolbar.
- Drag corner handles to recompose. Hold Shift to constrain to the original aspect ratio.
- Use the Angle slider or drag the horizon line directly to straighten a tilted shot.
- Press Enter or Return to commit the crop.
The Basic Panel: Tone and Color
- Exposure — overall brightness. Think of it as a master dial.
- Contrast — pushes lights brighter and darks darker. Start small: +10 to +20.
- Highlights and Shadows — recover detail in the brightest or darkest areas. Pulling Highlights down to -50 and lifting Shadows to +30 fixes 80% of harsh-light photos.
- Whites and Blacks — set your true white and black points. Hold Alt (Option on Mac) while dragging to see exactly where clipping starts.
- Vibrance vs Saturation — Vibrance boosts muted colors more and protects skin tones. Saturation cranks everything equally, which usually looks gaudy. Reach for Vibrance first.
White Balance
- White balance corrects the color cast from your light source. Tungsten lights look orange. Open shade looks blue. Lightroom can fix both.
- Use the White Balance Selector (eyedropper, shortcut W) and click on something that should be neutral gray or white — a sidewalk, a white shirt, a piece of paper.
- Or drag the Temp slider: left for cooler (blue), right for warmer (orange).
- RAW files let you change white balance freely with no quality loss. JPEGs allow much less correction before the image breaks down.
Sharpening and Noise Reduction
- Scroll down to the Detail panel in the right column.
- A Sharpening Amount of 40–60 is a solid starting point for screen output. Hold Alt while dragging to preview the effect in grayscale.
- The Masking slider limits sharpening to edges only — hold Alt while dragging to see exactly what's being sharpened versus protected.
- For noise reduction, start with the Luminance slider (grain) before touching Color (color speckling). High-ISO shots benefit most.
!Before and after comparison of a beginner Lightroom edit — flat, underexposed RAW photo on the left versus the corrected, colour-balanced version on the right
Modern AI Tools Every Beginner Should Try
A lot of what used to take Photoshop and 20 minutes of brush work is now one click in Lightroom. Three AI tools are worth your attention right away.
⚠️ AI features evolve quickly > Adobe ships updates to these tools regularly. Always check Adobe's What's New page for the latest feature set — capabilities have likely expanded since this article was published.
AI Denoise
- Found in the Detail panel via the Denoise button (works on RAW files only as of the current release — verify on Adobe's Denoise help page).
- Uses machine learning to reduce grain while preserving edge detail and texture.
- Creates a new DNG copy of the photo with denoise applied. Your original is preserved.
- A lifesaver for high-ISO photos shot indoors, at concerts, or at night.
- Processing takes anywhere from 30 seconds to several minutes depending on your hardware and image resolution.
AI Subject and Sky Masking
- Open the Masking panel (the dotted circle icon) and click Select Subject or Select Sky.
- Lightroom analyzes the photo and builds a precise selection in a few seconds.
- Any slider adjustment you make then applies only to the masked area. Brighten the sky without touching the foreground. Boost skin warmth without affecting the background.
- Combine multiple masks using Add and Subtract for complex scenes.
Generative Remove (Object Removal)
- Found in the Healing panel (band-aid icon). Choose Remove mode.
- Brush over an unwanted object — a stranger in your shot, a power line, a bin — and Lightroom generates a fill using surrounding pixels and AI.
- Simple backgrounds (sky, water, walls) give the cleanest results. Cluttered scenes need touch-ups.
- The tool's exact location and label may shift between Lightroom updates — check Adobe's release notes if you can't find it.
Editing on Desktop, Mobile, or Web: Same Photo, Any Device
!Illustration of the Lightroom mobile app interface on a smartphone alongside the Lightroom desktop interface showing the same photo being edited on both devices
One of the underrated wins of Lightroom (cloud) is that you can start a photo on your phone in a coffee shop and finish it on your desktop at home — the edits sync automatically.
Lightroom Across Devices
| Feature | Desktop App | Mobile App | Web Browser |
|---|---|---|---|
| Import method | Card reader or folder | Camera roll or in-app camera | Drag-and-drop upload |
| Editing tools | Full feature set | Most Basic & Mask tools | Core Basic panel tools |
| Offline access | Full | Cached photos only | None — requires connection |
| Export options | Full (JPEG, TIFF, DNG, PSD) | JPEG, original | JPEG |
| Sync status | Auto-sync when online | Auto-sync over Wi-Fi/cellular | Always live |
Feature parity shifts with each update, so verify on Adobe's comparison page before assuming a specific tool exists in mobile or web.
⚠️ Sync requires a subscription > Cross-device sync — edits appearing on your phone and desktop automatically — requires an active Adobe subscription with cloud storage. The free Lightroom mobile app has limited sync capabilities and storage caps.
Importing and Editing on Mobile
- Download the free Lightroom app from the App Store or Google Play.
- Tap the blue + button to import from your camera roll, files, or shoot directly in-app.
- The same Basic panel sliders (Exposure, Contrast, White Balance, Highlights, Shadows) are available in a touch-friendly layout.
- Edits sync automatically to the cloud and appear on the desktop app when you're online. For step-by-step mobile import details, Adobe's mobile import guide is the canonical reference.
Using Lightroom in a Web Browser
- Go to lightroom.adobe.com and sign in.
- Synced photos and albums appear instantly. No download required.
- Basic editing tools work in-browser. Advanced tools like AI Denoise still require the desktop app.
- Genuinely useful when you're traveling, on a borrowed computer, or just don't want to launch the desktop app.
Step 4 — Export: Saving Your Finished Photo
Editing in Lightroom doesn't actually create a file you can share. The original stays untouched, and your edits only become "real" when you export.
!Lightroom Export dialog illustration highlighting JPEG format, quality 85, sRGB colour space, and resize settings for web and social media sharing
Here's the export flow in six steps:
- Go to File > Export (or
Ctrl/Cmd+Shift+E). - Choose a destination folder for the exported file.
- Set the format to JPEG.
- Set Quality to 85 and Color Space to sRGB.
- Choose your resize option (long edge in pixels).
- Click Export.
Recommended Beginner Export Settings
| Setting | Web / Social Media | |
|---|---|---|
| File Format | JPEG | JPEG or TIFF |
| Quality | 85 | 95–100 |
| Color Space | sRGB | sRGB or Adobe RGB (follow lab spec) |
| Resize | Long edge 2048–2560 px | Full resolution or lab specification |
| Output Sharpening | Screen | Matte or Glossy Paper |
sRGB is the standard color space for screens and web display, defined by the IEC 61966-2-1 sRGB color space standard. Use it for anything heading to Instagram, your website, or email.
💡 Print quality depends on more than file size > Print sharpness is determined by PPI (pixels per inch), paper type, and viewing distance — not file size alone. 300 PPI is a widely cited target for close-up print viewing, but always follow your print lab's exact specifications. Don't trust a generic "max print size" rule from any single pixel count.
Exporting for Web and Social Media
- File > Export, or
Shift+Ctrl/Cmd+Eto repeat your last export settings. - File Settings: Format = JPEG, Quality = 85.
- Color Space = sRGB (the universal standard for screen display).
- Image Sizing: tick Resize to Fit, choose Long Edge, enter 2048–2560 pixels for most platforms.
- Output Sharpening: Screen, Standard.
- Click Export and choose where the file lands on your computer.
Exporting for Print
- Quality: 95–100 for maximum detail retention.
- Image Sizing: leave Resize unchecked to export at full resolution — unless your lab specifies otherwise.
- Color Space: use the profile your printer or lab specifies. sRGB is the safe default if you're unsure.
- Output Sharpening: choose Matte or Glossy Paper to match the paper you're printing on.
- Always verify final specs with your print service before sending a large order.
Free Download: Beginner Cheat Sheet and Practice RAW File
If you want to actually get faster at this, downloadable references beat memorization every time.
📘 What's included in the cheat sheet > The free PDF contains: the four-step workflow diagram, the full beginner glossary, the recommended export settings table, and the top keyboard shortcuts from this article. A sample RAW file is bundled so you can follow every step without needing your own camera — useful if you're trying Lightroom before a shoot.
Top Keyboard Shortcuts for Beginners
- G — Grid view in the Library module
- D — Switch to Develop module
- R — Crop Overlay tool
- W — White Balance Selector (eyedropper)
- Z — Zoom in/out
- \\ (Backslash) — Toggle before/after view
- Ctrl/Cmd + Z — Undo
- Ctrl/Cmd + Shift + E — Export dialog
Learn these eight and you'll cut your editing time roughly in half. The before/after toggle alone (\\) is how I check if an edit is actually helping or just making the photo look "different."
Lightroom Beginner FAQ
The Lightroom catalog is a database file that records every edit, rating, and preview for every photo you've imported. Think of it as a recipe book: your photos are the ingredients, the catalog holds the recipes, and the "meal" is only cooked when you export.
Is Adobe Lightroom free?
Lightroom is not free, but Adobe offers a free trial. The Lightroom mobile app is free to download with limited features; full functionality requires an Adobe subscription. Check adobe.com for current pricing — plans and costs change regularly.
What is the difference between Lightroom and Lightroom Classic?
Lightroom (cloud) syncs photos across all your devices — desktop, mobile, and web — and stores files in the cloud. Lightroom Classic is a desktop-only app that stores files locally and offers a more traditional, module-based workflow suited to photographers managing large local libraries.
Does Lightroom edit my original photos?
No. Lightroom is non-destructive — it stores your edits as instructions in the catalog and never modifies the original file. You can undo every edit at any time, even years later.
What is the Lightroom catalog?
The catalog is a database file that records every edit, rating, and preview for your photos. Think of it as a recipe book: your photos are the ingredients, the catalog holds the recipes. Original files are never changed — the recipe is only applied when you export.
Can I use Lightroom on my phone?
Yes. The Lightroom mobile app is available for iOS and Android and includes most of the same editing tools as the desktop version. With an active Adobe subscription, edits sync automatically between your phone, desktop, and web browser.
Should I shoot in RAW or JPEG for Lightroom editing?
RAW files give you significantly more editing flexibility — especially for recovering highlights and shadows, and for changing white balance without quality loss. JPEGs are smaller and more portable but contain less recoverable data. For best results in Lightroom, shoot RAW if your camera supports it.
How do I export a photo from Lightroom?
Go to File > Export, set format to JPEG, quality to 85, and color space to sRGB for web and social media. Choose a destination folder, set a resize dimension if needed, and click Export. Lightroom creates a new copy and leaves the original untouched.
What are Lightroom presets?
Presets are saved collections of slider settings that you can apply to a photo in one click. They're a great starting point for beginners — apply a preset and then fine-tune individual sliders to suit your image.
Sources
- What's New in Adobe Lightroom — Adobe Help Center
- Lightroom Classic System Requirements — Adobe Help Center
- Lightroom vs Lightroom Classic: Compare Versions — Adobe
- Adobe Lightroom Plans and Pricing — Adobe
- Understanding the Lightroom Catalog — Adobe Help Center
- Adobe Lightroom Beginner's Guide — DPReview
- How to Use Lightroom: A Complete Guide — PetaPixel
- Import Photos in Lightroom for Mobile — Adobe Help Center
- IEC 61966-2-1 sRGB Color Space Standard — ICC
- Reduce Noise in Photos Using AI Denoise — Adobe Help Center