What gear does a beginner photographer actually need to get started in 2026?
Quick answer: A beginner photographer needs a camera body, one or two lenses, at least one 64GB memory card, a spare battery, a sturdy tripod, and a padded camera bag. A complete entry-level kit costs approximately $500–$1,200 depending on whether you buy new or used equipment and which camera system you choose.
Build your perfect photography starter kit with our 2026 guide. Camera, lens, tripod, and accessory picks across $500, $1,000, and $2,000 budget tiers.
Key Takeaways
- A camera body, kit zoom lens, memory card, and spare battery are the true non-negotiables for day one.
- Mirrorless cameras dominate the 2026 entry-level market and suit most beginners over DSLRs.
- A 50mm f/1.8 prime lens is the highest-value second lens a beginner can add to their kit.
- Budget roughly $500 for an entry kit, $1,000 for a well-rounded kit, and $2,000 for a pro-curious setup.
- Buying used from reputable resellers like MPB or KEH can cut kit costs by 30–50%.
- Genre matters: portrait, landscape, travel, and sports shooters need slightly different lens and accessory priorities.
- Gear doesn't make you a better photographer — consistent practice with a modest kit beats expensive gear left on a shelf.
What Is a Photography Starter Kit?
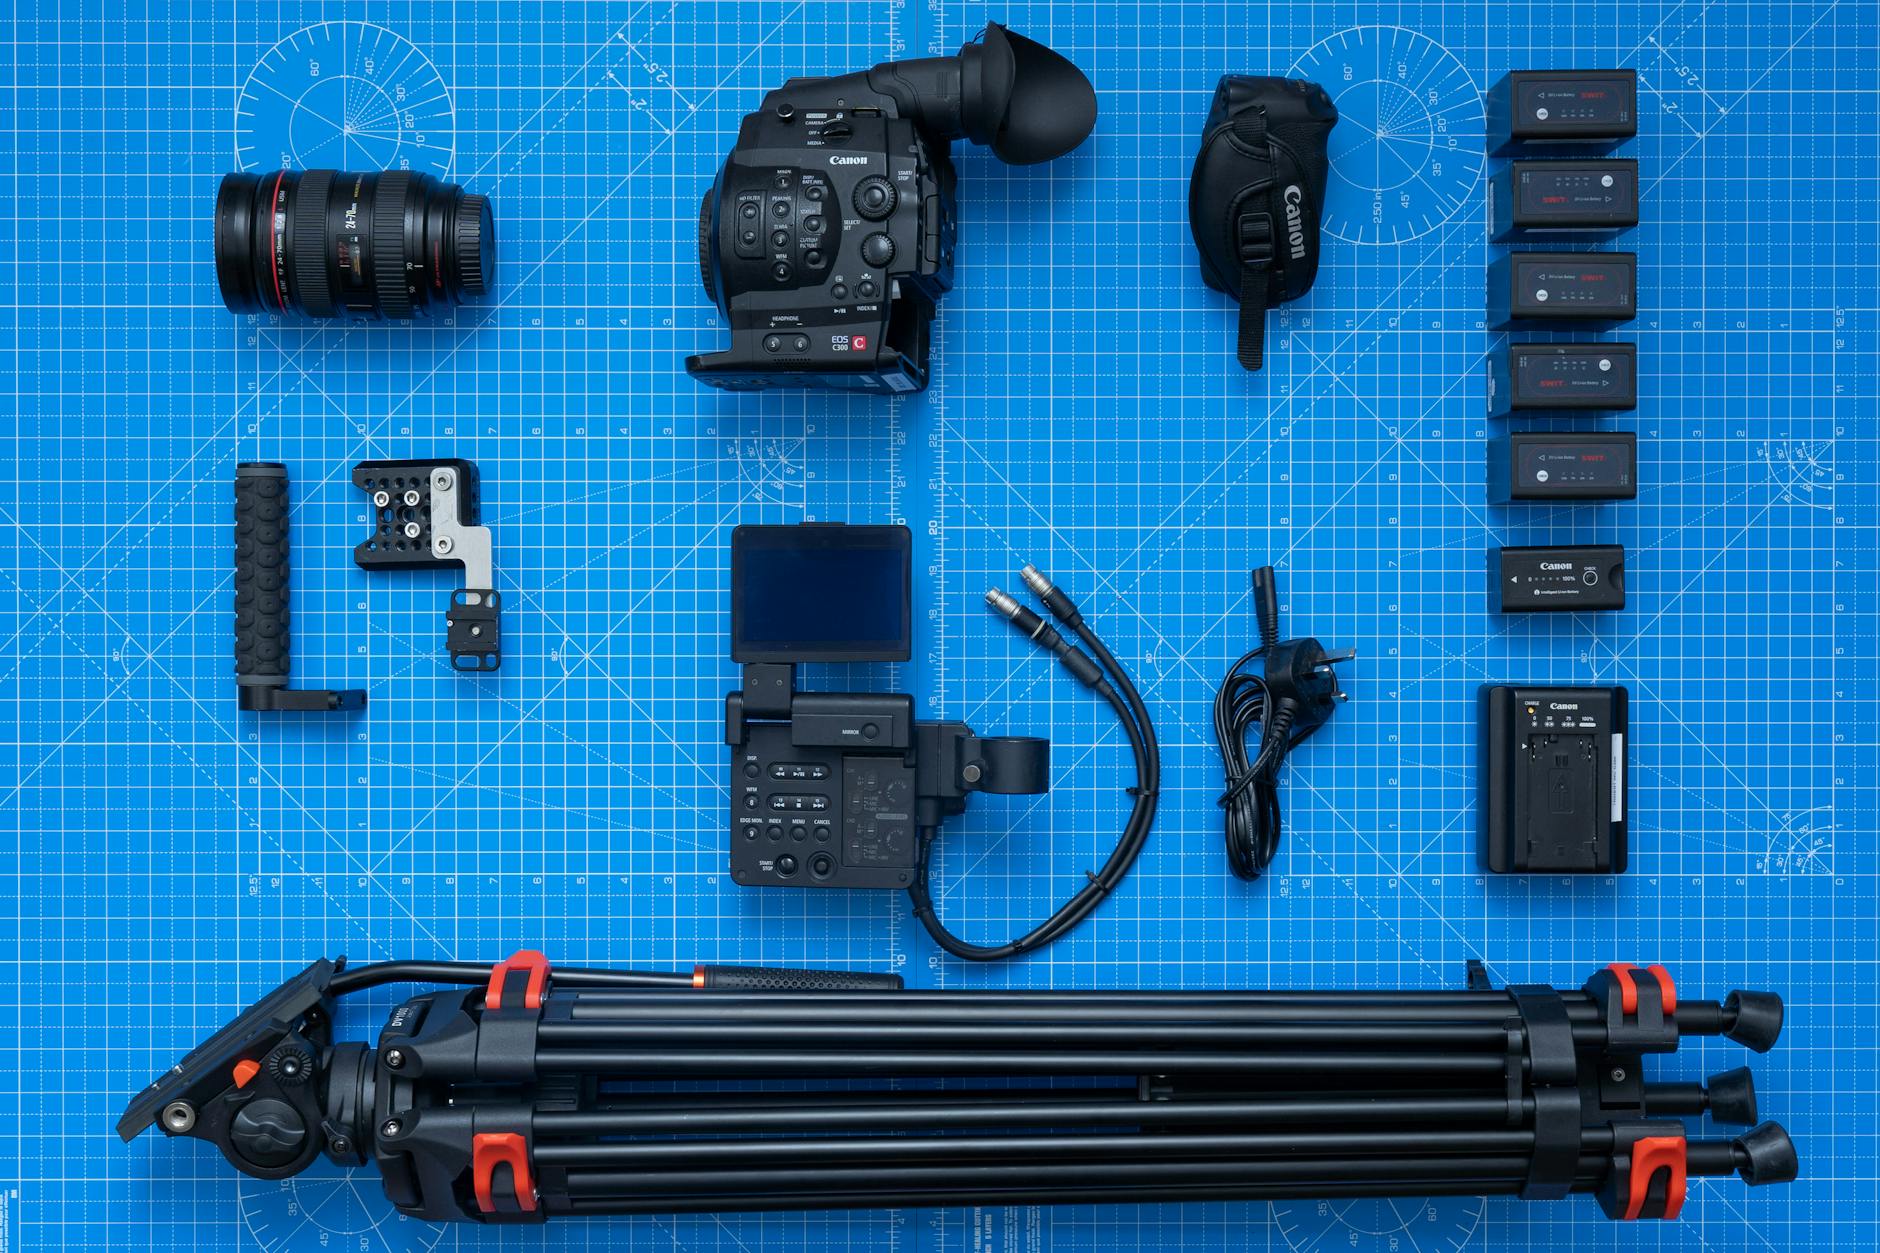
!Complete photography starter kit flat lay showing camera body, kit zoom lens, 50mm prime lens, tripod, SD cards, spare battery, cleaning kit, and padded camera bag on a neutral background
A photography starter kit is the minimum collection of equipment a beginner needs to start shooting, learning, and growing as a photographer. At its simplest, that means an entry-level camera body, one versatile lens (usually a kit zoom), a 64GB memory card, a spare battery, a tripod, and a padded bag — a complete setup that typically costs between $500 and $1,200 new, or as little as $400 used.
Here's the reality: walking into B&H or browsing Amazon's camera section will show you thousands of options. You don't need most of them. I've been shooting professionally for eight years, and the kit I recommend to beginners today is smaller than what I started with. Less gear, more shooting. That's how you actually learn.
💡 Tip — Gear Doesn't Make the Photographer > > The best camera is the one you have with you and know how to use. I've seen photographers with $8,000 setups produce mediocre work, and others with a used Sony a6000 produce portfolio-grade portraits. Spend your first year learning light, composition, and your camera's menu before upgrading anything.
Essential vs Optional Gear: Knowing the Difference
Essential gear is what you need before your first shoot:
- Camera body
- One lens (the kit zoom is fine)
- Memory card
- Spare battery
- Camera bag
Optional gear improves specific results but can wait:
- Extra lenses
- Filters
- Flash or strobes
- Studio lighting
- Reflectors
The most common mistake I see beginners make? Buying optional gear before they've hit a creative limit. You don't need a 70-200mm telephoto until you've actually tried photographing something far away and felt stuck. Wait for the problem before buying the solution.
Core Starter Kit Checklist (Non-Negotiables):
- Camera body (mirrorless or DSLR)
- Kit zoom lens (typically 18–55mm equivalent)
- At least one 64GB UHS-I SD memory card
- Spare battery and dual charger
- Padded camera bag or backpack
- Lens cleaning kit
How to Build Your First Photography Kit (Step-by-Step)
Here's the exact order I recommend for building your first kit. Steps 1–4 are non-negotiable. Steps 5–8 can wait until you've shot for a few weeks.
- Choose an entry-level mirrorless or DSLR camera body with an APS-C sensor.
- Select a kit zoom lens (usually 18–55mm) bundled with the body.
- Buy two 64GB SD memory cards from a reputable brand for redundancy.
- Add a spare OEM battery and dual charger to double your shooting time.
- Pick a sturdy travel tripod rated for at least 2x your camera-plus-lens weight.
- Install editing software like Adobe Lightroom or a free alternative.
- Add a quality UV or polarizer filter once you understand when to use one.
- Shoot a full practice session before buying anything else.
💡 Tip — Start Minimal, Expand Later > > Steps 1–4 are all you truly need on day one. Don't paralyze yourself trying to assemble a "perfect" kit before you've taken a single photo. The fastest way to learn what you need is to start shooting with the basics.
Step 1 – Choose a Camera Body
Look for an entry-level mirrorless camera with an APS-C sensor and interchangeable lenses. APS-C is a sensor size smaller than full-frame but larger than what's in your phone — it's the sweet spot for image quality and affordability.
Prioritize these three features:
- Autofocus quality — modern subject-tracking AF is now common at entry level
- Battery life — 300+ shots per charge is acceptable; more is better
- In-body image stabilization (IBIS) — helpful for video and handheld low-light, though not universal at entry level
Current 2026 entry-level categories worth investigating include Canon's EOS R series, Sony's Alpha lineup (ZV-E and a6000 successors), Fujifilm's X-series entry bodies, and Nikon's Z series entry models. These are examples, not rankings — check current pricing and availability at retailers before deciding.
Step 2 – Select Your First Lens
Start with the bundled kit zoom lens (typically 18–55mm or equivalent). It covers wide-angle through short telephoto in a single, lightweight package. It's perfectly capable of great images.
Plan to add a 50mm f/1.8 prime as your second lens within 3–6 months. This is the highest-value lens purchase a beginner can make — usually under $250 new, sharp wide open, and capable of beautiful background blur.
Resist buying more than two lenses in your first six months. I wasted close to $1,500 in my first year on a third and fourth lens I barely touched. Don't repeat my mistake.
Step 3 – Buy Memory Cards and Spare Batteries
Buy two 64GB SD cards from a trusted brand like SanDisk or Lexar. Two cards, not one. A single card failure can cost you an entire shoot's worth of irreplaceable images. Treat the second card as insurance, not extra storage.
UHS-I (V30-rated) is sufficient for stills and 1080p video. If your camera shoots 4K, check the manufacturer's recommended minimum write speed — UHS-II or V60/V90 cards may be required. Imaging Resource has a clear explainer on speed classes if you want to go deeper.
For batteries, get at least one genuine OEM spare. Entry-level mirrorless cameras typically eat through a battery in 300–450 shots, so a spare effectively doubles your shoot time.
Step 4 – Add a Tripod and Bag
Choose a travel tripod rated for at least 2x the combined weight of your camera and heaviest lens. A wobbly tripod is worse than no tripod — it'll cost you sharp images and your patience.
For your bag, a padded backpack-style with a rain cover gives you the best mix of protection and portability. Both items can be bought used or from budget brands without compromising results.
Step 5 – Install Editing Software
Adobe Lightroom is the industry-standard photo organization and editing tool. Subscription pricing varies — check Adobe's current plan options for accurate figures.
Free alternatives that work well for beginners:
- Darktable — open-source, full-featured, RAW support
- Google Photos — basic edits, good for casual use
- Apple Photos — built into macOS/iOS, surprisingly capable
Shoot in RAW format whenever possible. RAW files capture all the data your sensor records, giving you far more editing flexibility than JPEGs.
Steps 6–8 – Optional Upgrades Over Time
Step 6: Add a UV or circular polarizer filter — but buy quality glass only. Cheap filters can reduce sharpness and cause lens flare. A $20 filter on a $400 lens is a bad trade.
Step 7: Get a portable hard drive (1–2TB) once your cards start filling up. Backups matter more than people realize until they lose a year of photos.
Step 8: Take a full practice shoot — a portrait session, a hike, a wedding as a second shooter — and identify your actual creative constraints before buying anything else.
Essential Gear: What Every Beginner Needs
Here's everything in a complete photography starter kit, in order of importance:
- Camera body — entry-level mirrorless or DSLR, the foundation
- Kit zoom lens — 18–55mm equivalent, covers most everyday shots
- 50mm f/1.8 prime lens — your second lens, for portraits and low light
- Two 64GB SD memory cards — primary and backup
- Spare OEM battery and dual charger — doubles your shooting time
- Travel tripod with ball head — for low light, video, and self-portraits
- Padded camera backpack — protection plus portability
- Lens and sensor cleaning kit — preserves image quality
- UV or circular polarizer filter — only buy quality glass
- Photo editing software — Lightroom or a free alternative
Why Each Item Earns Its Place in the Kit
- Camera body — without it, nothing else matters. Spend the most of your budget here, but not all of it.
- Kit zoom — covers wide-angle to short telephoto in one lens. Don't dismiss it as "cheap" — modern kit lenses are surprisingly capable.
- Two SD cards — one card failing mid-shoot can cost irreplaceable images. Redundancy is cheap insurance.
- Spare battery — entry-level mirrorless batteries last 300–450 shots. A spare is mandatory for events, travel, or full-day shoots.
- Tripod — essential for long exposure, night photography, self-portraits, and stable video. You'll use it more than you expect.
- Bag — physical protection of your investment. A good bag also makes you more likely to actually bring your camera out.
- Cleaning kit — dust and smudges degrade image quality. Don't use your shirt on the front element.
- Editing software — the digital darkroom. RAW files need post-processing to reach their potential.
Choosing Your First Camera: Mirrorless vs DSLR
This is the single biggest gear decision you'll make. Let's break down the actual differences without the marketing fluff.
!Side-by-side comparison of a compact mirrorless camera and a larger DSLR camera on a wooden surface, highlighting the size difference
| Feature | Entry-Level Mirrorless | Entry-Level DSLR |
|---|---|---|
| Size & Weight | Compact, lighter | Larger, heavier |
| Autofocus System | Modern AI subject/eye tracking | Solid but older phase-detect |
| Battery Life | 300–450 shots per charge | 600–1,000+ shots per charge |
| Lens Ecosystem | Growing, manufacturer focus | Mature, lots of used options |
| Average New Price Range | ~$700–$1,200 (body + kit lens) | ~$500–$800 (body + kit lens) |
| Video Capability | 4K standard, modern codecs | Often 1080p, basic 4K |
| Future-Proofing | High — where R&D is going | Low — most makers pausing new bodies |
💡 Tip — Our Recommendation for Most Beginners > > For most beginners starting in 2026, an entry-level mirrorless camera offers the best balance of compact size, modern autofocus, and a growing lens ecosystem. DSLRs remain legitimate and cost-effective — especially used — but Canon, Nikon, and Sony have shifted virtually all new-product investment to mirrorless.
⚠️ Warning — Prices and Models Change > > Camera model recommendations reflect the 2026 market and are framed as current examples, not permanent rankings. Always check current pricing and availability before purchasing — promotions, new releases, and supply changes move prices significantly month to month.
Key Specs to Look for in a Beginner Camera
- Sensor size: APS-C offers the best balance of image quality and affordability. Full-frame isn't necessary at the entry level.
- Resolution: 20–26MP is plenty for printing, sharing, and cropping. More megapixels mostly mean larger files.
- Autofocus: Look for eye/face detection AF — now common even at entry price points.
- In-body image stabilization (IBIS): Helpful for video and handheld low-light, though not universal at entry level.
- Lens mount: Make sure the camera uses a current, well-supported mount with native lens options.
- Connectivity: Built-in Wi-Fi and Bluetooth make transferring images to your phone painless.
Current Entry-Level Camera Categories (2026 Context)
A few categories worth investigating, with notes on what each does well:
- Canon EOS R series entry bodies — strong autofocus, wide native lens selection, beginner-friendly menus
- Sony ZV-E and a6000-series successors — compact APS-C bodies with class-leading autofocus
- Fujifilm X-series entry models — distinctive film simulation modes, excellent JPEG output, strong manual dials
- Nikon Z series entry bodies — good ergonomics, solid image quality, growing Z-mount lens ecosystem
For deeper, model-by-model comparisons, both DPReview and PetaPixel maintain regularly updated buying guides worth checking before purchase.
Which Lenses Should a Beginner Start With?
A beginner photographer needs two lenses for the first year: the kit zoom lens (typically 18–55mm equivalent) for everyday versatility, and a 50mm f/1.8 prime for portraits, low-light, and learning shallow depth of field. Combined, these two lenses cover roughly 90% of common shooting situations at a beginner-friendly price.
!A 50mm prime lens placed next to an 18-55mm kit zoom lens on a neutral surface, illustrating the size and design differences between the two beginner lens types
| Feature | Kit Zoom (18–55mm) | 50mm f/1.8 Prime |
|---|---|---|
| Versatility | High — wide to short telephoto | Low — fixed focal length |
| Maximum Aperture | f/3.5–5.6 (varies by zoom) | f/1.8 (constant) |
| Low-Light Performance | Modest | Excellent |
| Background Blur (Bokeh) | Limited | Beautiful, creamy |
| Typical Price Range (New) | ~$100–250 (often bundled) | ~$150–250 |
| Best Use Case | Everyday, travel, learning | Portraits, low light, creative work |
💡 Tip — The Two-Lens Starter Strategy > > Most beginners need only two lenses for the first year: the kit zoom for flexibility in everyday shooting and a 50mm f/1.8 prime for portraits, events, and low-light. Resist adding a third lens until you consistently feel limited by these two. I shot weddings professionally for two years with just these two lenses before adding a 70-200mm.
Understanding Focal Length and Aperture in Plain English
Focal length (measured in millimeters): shorter numbers = wider field of view; longer numbers = more zoomed in.
- 18mm = wide, fits a lot in the frame (landscapes, interiors)
- 50mm = roughly what your eye sees (portraits, everyday)
- 200mm = significant zoom (wildlife, sports)
Aperture (the f-number): lower f-number = more light enters the lens and a shallower depth of field (blurry background); higher f-number = less light but sharper from front to back.
- f/1.8 = lots of light, very blurry background — great for portraits
- f/5.6 = moderate light, moderate depth of field
- f/11 = less light, sharp from foreground to background — great for landscapes
For a beginner, the kit zoom covers most situations and the 50mm f/1.8 adds creative low-light and portrait capability at low cost.
When to Consider a Third Lens
- Telephoto zoom (70–300mm range): Add if you shoot wildlife, sports, or events where you can't get close to your subject.
- Wide-angle lens (10–20mm range): Add if landscape or architecture becomes a primary focus.
- Macro lens: Add only if close-up product or nature photography is a specific, recurring need.
Wait until you feel a real creative limitation before spending on a third lens. "I might use it" is not a creative limitation — that's gear acquisition syndrome talking.
Supporting Gear: Tripods, Memory Cards, Batteries, and Bags
Here are the supporting accessories every beginner needs and why:
- Tripod — stability for low light, long exposures, video, and self-portraits
- Two SD memory cards — redundancy against card failure
- Spare OEM battery — doubles your shooting time per outing
- Padded camera bag — protection plus practical portability
- Lens cleaning kit — preserves image quality and lens coatings
- Camera strap — wrist or neck strap, prevents drops
- Memory card reader — faster transfers than camera USB cable
💡 Tip — Memory Card Speed Classes Explained > > UHS-I (V30 rated) is sufficient for most beginner shooting, including 1080p video. If your camera shoots 4K, check the manufacturer's recommended minimum write speed in your camera manual — UHS-II or V60/V90 cards may be required for high-bitrate 4K recording.
⚠️ Warning — Third-Party Batteries: A Note on Safety > > Reputable third-party battery brands can be cost-effective, but quality varies widely. For your primary battery, OEM (manufacturer-branded) is the safest choice. If buying third-party, choose well-reviewed brands like Wasabi Power and avoid extremely cheap unbranded options — low-quality batteries can carry overheating risks.
!Open padded camera backpack showing organized placement of a mirrorless camera body, two lenses, batteries, and SD card wallet inside the bag's compartments
Choosing a Tripod
- Look for a rated load capacity of at least 2x the weight of your heaviest camera-plus-lens combo
- Ball head vs pan-tilt head: ball heads are faster and more versatile for stills; pan-tilt heads offer more precise video panning
- Travel tripod vs full-size: travel tripods (fold to ~40cm) suit beginners who want portability; full-size is better if you mostly shoot in one location
- Carbon fiber is lighter but pricier than aluminum — aluminum is fine for most beginners
- Prioritize stability over price. A $40 tripod that wobbles isn't a tripod, it's a frustration.
Choosing Memory Cards
- Buy from established brands (SanDisk, Lexar, Sony) to minimize failure risk
- 64GB minimum; 128GB reduces card-swapping mid-shoot
- Always buy two cards — treat them as paired insurance
- Check your camera's max supported card speed before paying for UHS-II
Choosing a Camera Bag
- Padded backpack: best for day hikes, travel, and carrying multiple lenses — look for a built-in rain cover
- Sling bag: faster single-hand access; good for street and event photography with a minimal kit
- Hard case (Pelican-style): best for air travel and extreme weather; heavier and less convenient for daily use
- Minimum fit: your camera body, two lenses, batteries, cards, and cleaning kit should fit comfortably
- Test the fit in-store if possible, or compare listed internal dimensions to your gear measurements
Photography Starter Kit Cost by Budget Tier
Let's break down the actual costs across three realistic budget tiers. All figures are approximate ranges as of 2026 — prices fluctuate based on retailer, region, promotions, and new releases.
| Tier | Camera | Lens(es) | Key Accessories Included | Approximate Total Range |
|---|---|---|---|---|
| **Entry (~$500)** | Used APS-C mirrorless or DSLR body | Bundled kit zoom | 64GB SD card, spare battery, basic bag | $450–$650 |
| **Standard (~$1,000)** | New entry-level mirrorless + kit lens | Kit zoom + 50mm f/1.8 prime | Two 64GB cards, spare OEM battery, travel tripod, padded backpack | $900–$1,250 |
| **Pro-Curious (~$2,000)** | Mid-range mirrorless body | Kit zoom + 50mm prime + one specialty lens | UHS-II cards, quality tripod, premium bag, filters, Lightroom subscription | $1,800–$2,400 |
!Infographic comparing three photography starter kit budget tiers: Entry approximately $500, Standard approximately $1,000, and Pro-Curious approximately $2,000 with gear items listed for each tier
💡 Tip — New vs Used: The Budget Multiplier > > Buying used or refurbished gear from reputable sellers (MPB, KEH, manufacturer-certified programs) can reduce kit costs by 30–50%. That effectively moves you from the Entry tier to the Standard tier for the same spend — or gets you Pro-Curious gear for a Standard budget.
⚠️ Warning — Prices Fluctuate > > All cost figures are approximate ranges as of 2026. Camera prices shift constantly due to new model releases, retailer promotions, and currency fluctuations. Always check current pricing at major retailers before purchasing.
Where to Allocate Your Budget
- Spend the most on the camera body and your primary lens — these have the largest impact on image quality and shooting experience
- Don't cut corners on memory cards, batteries, and cleaning kits — they're low-cost but high-importance
- Tripods and bags are one-time purchases that outlast multiple camera upgrades — buy for durability
- Editing software (Lightroom subscription or free alternative) is an ongoing cost — factor it in
- Optional accessories (filters, flash, studio lights) should only be purchased after identifying a specific creative need
Pick Your Kit by Photography Style
!Infographic matrix showing recommended photography gear priorities for five beginner photography styles: portrait, landscape, travel, street, and sports
Generic gear lists are useful, but your needs shift based on what you actually photograph. Here's how kit priorities change by style:
| Style | Priority Lens | Essential Accessory | Nice-to-Have Add-On |
|---|---|---|---|
| **Portrait** | 50mm or 85mm prime | Collapsible 5-in-1 reflector | Speedlight + softbox |
| **Landscape** | Wide-angle zoom (10–20mm) | Sturdy full-size tripod | Circular polarizer |
| **Travel** | Versatile mid-range zoom | Compact tripod or Gorillapod | UV filter, extra card |
| **Street** | 35mm or 50mm prime | Small, low-profile bag | Neutral density filter |
| **Sports/Action** | Telephoto zoom (70–300mm) | Fast V60+ SD card | Monopod |
💡 Tip — Don't Know Your Style Yet? That's Normal. > > Most beginners haven't found their niche in the first few months. Start with the Standard kit (camera + kit zoom + 50mm prime) and use it across different styles. Your gear needs will clarify naturally as your interests develop. I thought I'd be a landscape shooter — turned out I loved weddings.
Portrait Photography Starter Kit
- A 50mm f/1.8 prime is the ideal first portrait lens — affordable, sharp, and produces attractive background blur
- An 85mm f/1.8 is the classic portrait focal length but costs more and is less versatile for other genres
- A collapsible 5-in-1 reflector ($25–$50) is the most underrated lighting tool a beginner can buy
- Natural window light is free and produces beautiful portraits — start there before investing in flash
Landscape Photography Starter Kit
- A sturdy full-size tripod is more critical for landscape work than any other genre. Don't scrimp here.
- A circular polarizer filter reduces glare on water and deepens sky contrast — one of the few filter effects that can't be fully replicated in post
- A wide-angle lens (10–20mm on APS-C) becomes valuable when landscapes are a primary focus, but the kit zoom's wide end works well to start
Travel and Street Photography Starter Kit
- Compact mirrorless bodies excel here — size and weight matter when you're walking all day
- A versatile mid-range zoom (18–135mm or 24–200mm equivalent) reduces lens swapping
- A small, non-camera-branded bag lowers theft risk in crowded environments — a basic backpack draws less attention than a logo-covered camera bag
- A flexible mini tripod (Gorillapod-style) is more practical than a full tripod for travel
Saving Money: How to Buy Used Camera Gear Safely
Buying used can save you 30–50% versus new prices. Here's how to do it without getting burned:
- Buy from specialist dealers with published grading systems — MPB, KEH, Adorama Used
- Use manufacturer-certified refurbished programs for the safest used option
- Check the shutter count on used DSLR/mirrorless bodies (most are rated for 100,000+ actuations)
- Avoid private marketplace listings with no seller history or no return policy
- Test everything within the return window — autofocus, all buttons, image quality on a real shoot
📋 Example — Understanding Condition Grades > > Most reputable used dealers use a grading scale (typically: Like New, Excellent, Good, Fair). An "Excellent" grade from a specialist like MPB or KEH typically means full functional condition with only minor cosmetic wear — perfectly safe for daily use. "Good" usually means more visible wear but still fully functional.
Used Gear Safety Checklist:
- Buy from specialist dealers with a published grading system (MPB, KEH, Adorama Used)
- Check the shutter count on DSLR/mirrorless bodies — most are rated for 100,000+ actuations
- Request or review high-resolution photos of any cosmetic wear before purchasing online
- Confirm the seller's return policy before committing
- Avoid private marketplace listings with no seller history or verification
- Test all physical controls, autofocus, and image quality on arrival and within the return window
Best Places to Buy Used Camera Gear
- [MPB](https://www.mpb.com/en-us/content/used-camera-gear-grading) — specialist marketplace with standardized grading, returns, and large inventory
- [KEH Camera](https://keh.com/blog/how-to-buy-used-camera-gear/) — one of the longest-established used camera dealers in the US
- Adorama Used and B&H Used — reputable retailer used departments, often with warranties
- Manufacturer certified refurbished programs — factory-tested with limited warranty, often the safest option
- eBay and Facebook Marketplace — higher risk; only buy from sellers with strong verified feedback and a clear return policy
Red flags to avoid: unverified private sales with no photos, prices dramatically below market (often scams or stolen gear), or listings that refuse inspection or returns.
Editing Software for Beginners: Completing Your Digital Kit
A beginner photographer should use Adobe Lightroom — the industry-standard photo organization and editing tool — if budget allows for the subscription. Free alternatives include Darktable (open-source, full-featured, RAW support) and Google Photos (basic edits, best for casual use).
| Software | Cost | Best For | RAW Support | Platform |
|---|---|---|---|---|
| Adobe Lightroom | Subscription (varies) | Beginner to pro workflow | Yes | Mac, Windows, iOS, Android |
| Darktable | Free (open source) | Lightroom alternative on a budget | Yes | Mac, Windows, Linux |
| Google Photos | Free (with storage limits) | Casual editing and sharing | Limited | All platforms |
| Apple Photos | Free | Mac/iOS users wanting simplicity | Yes (basic) | Mac, iOS only |
| Capture One | Subscription or perpetual | Tethered studio work, color grading | Yes | Mac, Windows |
💡 Tip — Why Shoot RAW? > > RAW files capture all the data your sensor records, giving you far more control in editing — recovering blown highlights, adjusting white balance after the fact, reducing noise without losing detail. JPEGs apply in-camera processing and permanently discard data. For beginners learning to edit, RAW is the recommended format despite the larger file sizes. Yes, your computer can handle it. Yes, your SD card can hold them.
Common Beginner Gear Mistakes to Avoid
I've made most of these mistakes. So has every photographer I know. Save yourself the time and money:
- Buying the most expensive camera body and running out of budget for lenses
- Skipping a spare battery and dying mid-shoot
- Buying one cheap SD card instead of two reliable branded ones
- Putting a $15 UV filter on a $500 lens, killing image quality
- Confusing megapixels with image quality — sensor size and lens quality matter more
- Dismissing the kit zoom as "inferior" and buying extra lenses you don't need yet
- Skipping a cleaning kit until smudges appear in every shot
- Forgetting editing software in your total budget
⚠️ Warning — The Most Expensive Mistake > > Buying more gear than you can learn to use is the single most common beginner mistake. A $5,000 camera does not produce better photos in the hands of a beginner than a $500 camera. Invest in practice, a course, or mentorship before upgrading your kit. I've watched dozens of photographers waste $3,000+ on gear that never came out of the bag.
Gear Mistakes That Cost Beginners Time and Money
- Body-first, lens-last spending. New beginners often blow 80% of their budget on the camera body and end up with a kit lens forever. Lenses outlast bodies by a decade — invest accordingly.
- The "I'll just get the cheap one" trap on safety items. Cheap straps break. Cheap batteries can overheat. Cheap SD cards lose data. These aren't places to save $10.
- Filter degradation. A no-name UV filter introduces flare, ghosting, and reduced sharpness. If you're putting glass in front of your lens, buy from B+W, Hoya, or similar — or skip filters entirely.
- Sensor neglect. A single smudge on your sensor or rear lens element shows up in every shot at narrow apertures. A $20 cleaning kit prevents hours of editing.
The 'Gear Acquisition Syndrome' Trap
GAS (Gear Acquisition Syndrome) is the habit of believing each new piece of equipment will fix a creative problem. It almost never does.
The antidote is simple: identify a specific creative limitation first, then research whether gear is actually the solution. Most of the time, improving composition, light awareness, and your understanding of camera settings has 10x the impact of new equipment.
If your portraits feel flat, it's almost never because you need a better lens. It's because you haven't studied light yet. If your landscapes look boring, a wide-angle won't fix the composition. The cheapest performance upgrade in photography is always practice.
Frequently Asked Questions About Photography Starter Kits
What gear do I really need to start photography?
The true non-negotiables are an entry-level camera body (mirrorless or DSLR), a kit zoom lens, at least one 64GB memory card, and a spare battery. A padded bag and tripod round out the practical essentials. Everything else can wait until you identify a specific creative need.
How much should I spend on my first photography kit?
Expect approximately $500 for a functional entry kit (often using used or older new gear), around $1,000 for a well-rounded new kit with a prime lens and tripod, or approximately $2,000 for a pro-curious setup with multiple lenses and quality accessories. All figures are approximate ranges as of 2026 and vary by retailer and region.
Should beginners buy a DSLR or a mirrorless camera?
For most beginners in 2026, an entry-level mirrorless camera is the recommended choice — they're more compact, offer modern autofocus, and most manufacturers are investing in their mirrorless lens ecosystems. DSLRs remain a solid and cost-effective option, particularly used, but represent a legacy technology path.
Is a 50mm prime lens good for beginners?
Yes. A 50mm f/1.8 prime is widely considered the highest-value second lens a beginner can buy. It's typically affordable, sharp, and produces attractive background blur at f/1.8 — making it excellent for portraits, low-light, and learning manual focus control. Start with your kit zoom, then add a 50mm when you're ready.
Do I need a tripod as a beginner photographer?
A tripod isn't essential for your very first shoot but becomes necessary surprisingly quickly — particularly for low-light photography, long exposures, video, or self-portraits. It's a worthwhile early purchase that will outlast multiple camera upgrades.
What size SD card should a beginner buy?
A 64GB UHS-I (V30-rated minimum) SD card from a reputable brand is the recommended starting point for most beginners shooting stills and 1080p video. If your camera supports 4K video, check the manufacturer's recommended minimum write speed — a UHS-II or V60/V90 card may be required. Always buy two cards for redundancy.
Can I start photography with just a smartphone?
Yes — modern flagship smartphones produce excellent images and are a legitimate way to learn composition, light awareness, and basic editing. However, a dedicated mirrorless or DSLR camera offers significantly more creative control (manual settings, interchangeable lenses, larger sensor), better low-light performance, and a higher ceiling for learning. If you're serious about photography as a skill or hobby, a dedicated camera is the better long-term investment.
Is it safe to buy used camera gear?
Buying used camera gear from specialist dealers (MPB, KEH, Adorama Used, manufacturer-certified refurbished programs) is generally safe and can save 30–50% versus new prices. Check the seller's grading system, return policy, and shutter count for camera bodies. Avoid unverified private marketplace listings with no seller history or no return option.
What editing software should a beginner photographer use?
Adobe Lightroom is the industry standard for organizing and editing photos and is recommended for most beginners who plan to shoot RAW files. A subscription is required (cost varies by plan). Free alternatives include Darktable (open source, full-featured) and Google Photos (limited editing, best for casual use).
How many lenses does a beginner actually need?
Two lenses are enough for the first year: your kit zoom lens (typically 18–55mm) for everyday versatility, and a 50mm f/1.8 prime for portraits and low-light work. A third lens (telephoto or wide-angle) should only be added once you consistently feel creatively limited by your existing two.
Sources
- Best Cameras for Beginners — DPReview Buying Guide
- Choosing Your First Camera — B&H Explora
- Best Beginner Cameras — PetaPixel
- Understanding Used Camera Gear Grades — MPB
- What's New in Adobe Lightroom — Adobe Help Center
- SanDisk SD Memory Cards — Official Product Page
- Canon EOS R System — Official Canon USA
- Sony Alpha Camera Lineup — Sony Official
- How to Read a Memory Card Speed Rating — Imaging Resource
- How to Buy Used Camera Gear — KEH Camera Blog