What is manual mode on a camera and how do you use it as a beginner?
Quick answer: Manual mode (M on the mode dial) gives you full independent control over ISO, aperture, and shutter speed — the three variables that determine exposure. By setting each value yourself, you decide exactly how bright, how sharp, and how deep-in-focus every shot looks, without the camera second-guessing your creative intent. Once you learn a simple dial-in workflow, manual mode becomes the most reliable and repeatable way to shoot in any lighting situation.
Master manual mode photography with this step-by-step beginner's guide covering ISO, aperture, shutter speed, scenario settings, troubleshooting, and a free cheat sheet.
Key Takeaways
- Manual mode lets you control ISO, aperture, and shutter speed independently for full creative control.
- Start with ISO 100 in daylight, then set aperture for depth of field, then shutter speed for exposure.
- Use the in-camera light meter and histogram together to confirm correct exposure before committing.
- Modern mirrorless cameras show a live exposure preview in the viewfinder, making manual easier than ever.
- Manual + Auto ISO is a legitimate hybrid workflow favored by event and wildlife photographers.
- Semi-auto modes (Aperture Priority, Shutter Priority) are not inferior; they're valid creative tools.
- Run your own high-ISO test because noise performance varies significantly between camera models.
What Is Manual Mode in Photography?
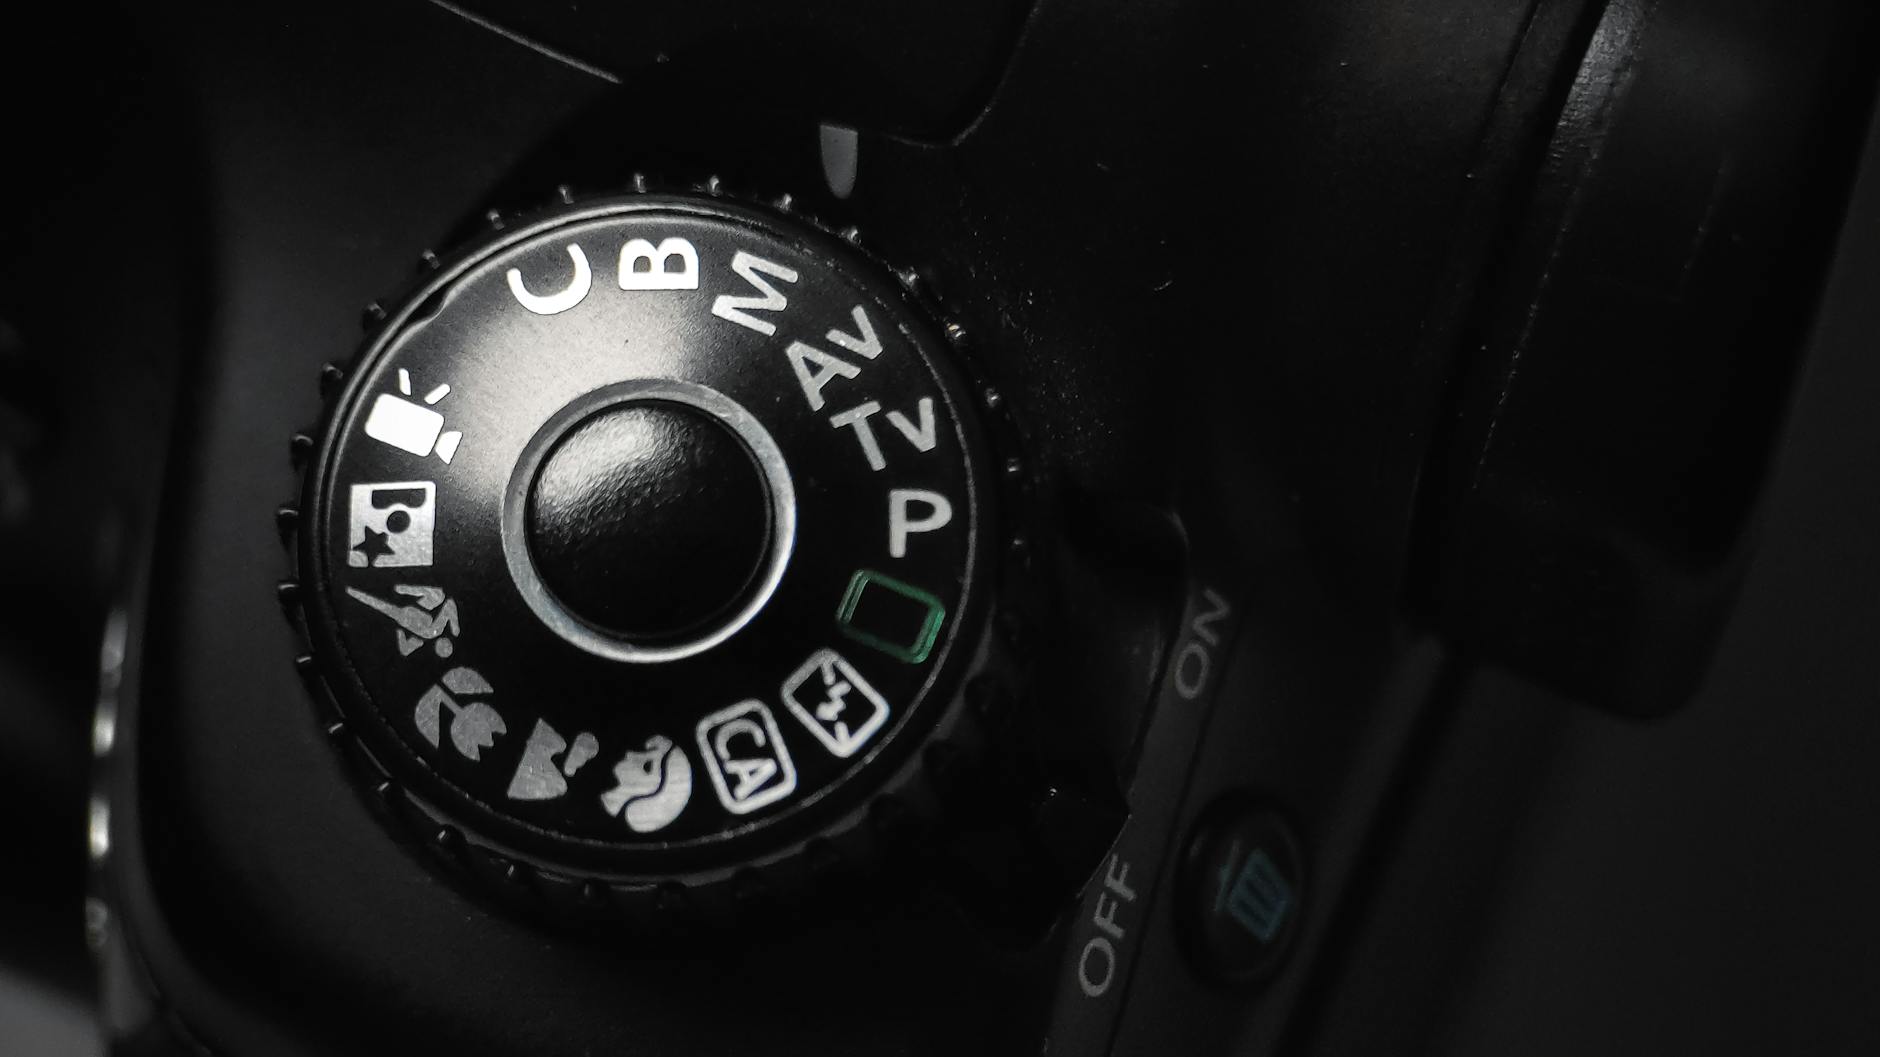
!Close-up of a camera mode dial set to M for manual mode
Manual mode is the setting on your camera (marked M on the mode dial) where you set ISO, aperture, and shutter speed yourself, with no automatic intervention. The camera measures the light through its meter and makes a recommendation, but it never changes a setting on its own. That's the whole point — predictable, repeatable, intentional exposure.
Here's the reality: most beginners think manual mode is some sort of expert badge. It isn't. It's just a tool that gives you the same kind of control a film photographer had in 1975. The difference is your modern camera now shows you a live preview and a histogram, which makes learning it much faster than it used to be.
💡 Tip — Manual Mode vs. Semi-Auto Modes > > Your camera dial has four exposure modes that matter: Manual (M), Aperture Priority (A or Av), Shutter Priority (S or Tv), and Program (P). In Aperture Priority you pick the f-stop and the camera picks the shutter speed. In Shutter Priority you pick the shutter speed and the camera picks the f-stop. Program lets the camera pick both but still gives you some override room. None of these are inferior to manual — they're tools for different jobs. Manual mode adds one thing: repeatability. You set it, it stays set.
What Does "Full Manual Control" Actually Mean?
In Manual mode the camera does not change any exposure setting automatically. Every value you dial in stays locked until you change it. That makes your exposure 100% repeatable, which matters in studio setups, landscapes, panorama stitching, and any scene where the light isn't actively shifting.
Compare that to Auto, where the camera picks all three variables based on its best guess, or Aperture Priority, where the camera adjusts shutter speed every time light changes. Both are useful. Neither gives you the locked-in consistency manual offers.
One honest caveat: manual mode doesn't automatically produce better photos. It produces more intentional photos. If you don't know why you're picking each value, you'll get worse results in manual than you would in Aperture Priority. The benefit shows up after you understand the relationship between the three settings.
Why Learn Manual Mode?
- You'll understand exactly why a photo looks the way it does, which means you can reproduce it or fix it next time.
- You can override the camera's meter when it gets fooled by tricky light — snow, backlit subjects, stage performances, anything high-contrast.
- You'll get consistent exposure across a bracketed sequence or a multi-image panorama stitch (Aperture Priority can't do this reliably).
- It builds the foundational knowledge that makes every other camera mode, lens choice, and editing decision easier.
The Exposure Triangle: ISO, Aperture, and Shutter Speed
Three variables control how bright your photo is and how it looks. Change one, and you'll often have to compensate with another to keep exposure balanced. This is the exposure triangle.
!Exposure triangle diagram showing how ISO, aperture, and shutter speed interact to control exposure
Here's the one-line version of each:
- ISO — how brightly the camera records and amplifies the light hitting the sensor.
- Aperture — how wide the lens opening is, which controls both the amount of light entering and how much of the scene is in focus.
- Shutter speed — how long the sensor is exposed to light, which controls motion blur.
Change any one of those, and you're trading something. Faster shutter speed = less light = you'll need a wider aperture or higher ISO. Wider aperture = blurrier background = potentially less depth of field than you want. Higher ISO = brighter capture = more digital noise. That's the trade-off you're constantly balancing.
💡 Tip — ISO Is Not "Light Sensitivity" — Here's Why It Matters > > You'll see ISO described as "sensor sensitivity" everywhere. That's not quite right, and the distinction matters once you start pushing ISO in low light. ISO is closer to a signal amplification standard: the sensor's underlying sensitivity is fixed, and raising ISO tells the camera to amplify the captured signal more aggressively. More amplification = brighter image, but also more visible noise. Nikon's explanation of ISO sensitivity frames this well. I'd also strongly recommend running your own ISO noise test on your specific camera (shoot the same scene at ISO 100, 400, 800, 1600, 3200, 6400, 12800, then pixel-peep) because performance varies enormously between models.
ISO: How Brightly the Camera Records Light
ISO is your last-resort exposure lever. Push it too high and you'll see noise — that grainy, mushy texture in the shadows. Push it too low when you don't have enough light and your shots come out dark or motion-blurred.
Practical starting values:
- Bright outdoor sun: ISO 100–200
- Overcast or open shade: ISO 400–800
- Indoor mixed light: ISO 800–3200
- Dim indoor or night handheld: ISO 3200–12800 (camera-dependent)
The "highest usable ISO" question doesn't have a universal answer. A modern full-frame body might give you clean files at ISO 6400. An older crop-sensor body might fall apart at ISO 1600. Test yours. Don't take anyone's word for it, including mine.
Aperture: Depth of Field and Light Volume
!Depth of field comparison showing background blur from f/1.8 to f/11 on the same subject
Aperture is the size of the opening in your lens, measured in f-stops. Lower number = wider opening = more light + shallower depth of field. Higher number = narrower opening = less light + more of the scene in focus.
Here's the practical f-stop guide:
- f/1.4 – f/1.8 — Very shallow depth of field. Background completely blurred. Great for portraits and low light.
- f/2.8 — Slight background blur, plenty of light gathering. Standard wedding and event aperture.
- f/4 – f/5.6 — Moderate depth. Versatile general-purpose range.
- f/8 – f/11 — Front-to-back sharpness. Standard landscape range and most lenses' sharpest aperture.
- f/16 – f/22 — Maximum depth of field, but watch for softness from diffraction.
Sony has a clear technical primer on aperture and f-stops if you want the manufacturer-level explanation.
⚠️ Warning — Watch Out for Diffraction at Very Small Apertures > > You'll see lots of advice telling you to shoot landscapes at f/22 for maximum sharpness. Don't. Once you stop down past roughly f/11 to f/16 on most modern sensors, diffraction starts softening your image — the entire frame gets mushier, even though more of it is "in focus." LensRentals has tested diffraction extensively, and the data is clear: f/8 to f/11 is the sweet spot for most lenses. Use f/16 sparingly and only when you absolutely need that depth.
Shutter Speed: Freezing or Blurring Motion
!Shutter speed comparison showing frozen motion at 1/1000s versus motion blur at 1/30s
Shutter speed is how long the sensor is exposed. Fast = frozen action. Slow = motion blur or light trails.
Practical ranges:
- 1/1000s – 1/2000s — Birds in flight, sports, fast action
- 1/500s — Running kids, dogs at play
- 1/250s — Walking subjects, candid portraits
- 1/60s – 1/125s — Stationary handheld subjects
- 1s – 30s (tripod required) — Night scenes, light trails, astrophotography
The reciprocal rule is your starting point for handheld sharpness: minimum shutter speed should be at least 1 ÷ focal length. So at 50mm, don't go slower than 1/50s handheld. At 200mm, don't go slower than 1/200s. That's the baseline.
Image stabilization changes the math. Modern in-body stabilization (IBIS) can give you 4–7 stops of leeway, meaning you might handhold a 50mm lens at 1/4s. But test it on your gear — manufacturer ratings tend to be optimistic, and stabilization can't fix subject motion. If your subject is moving, the reciprocal rule is irrelevant. Use a shutter speed fast enough to freeze them.
How to Use Manual Mode: Step-by-Step Workflow
The whole point of manual mode is having a workflow you can repeat. Here's the six-step process I use on every shoot:
- Switch your camera to Manual mode by rotating the mode dial to M.
- Set ISO based on available light (start at base ISO in daylight).
- Choose aperture for the depth of field you want.
- Adjust shutter speed until the in-camera meter reads zero.
- Set white balance and metering mode.
- Take a test shot and review the histogram, then fine-tune.
That's the framework. Let me break down each step.
💡 Tip — The Sunny 16 Rule: Your Outdoor Starting Point > > On a bright sunny day, set your aperture to f/16, your shutter speed to roughly 1/ISO (so at ISO 100, that's 1/100s), and you'll get a usable exposure. That's the Sunny 16 rule, and it's been around since film cameras. PetaPixel has a solid breakdown of how to use it. Don't treat it as gospel — it's a sanity check. If your meter disagrees wildly with Sunny 16 in bright sun, something's off (wrong metering mode, exposure compensation left on, or a weird scene).
Step 1 — Switch to Manual Mode
Locate the PASM mode dial on top of your camera body and rotate it to M. Most Canon, Nikon, Sony, and Olympus bodies work this way.
Fujifilm is the odd one out — many Fuji bodies don't have a PASM dial. Instead, you set manual mode by using the dedicated aperture ring on the lens and the shutter speed dial on top of the camera, both set to manual values (not "A" for auto). Same outcome, different interface.
Confirm your mode indicator shows "M" in the viewfinder or LCD before continuing.
Step 2 — Set Your ISO First
Start at the lowest usable ISO for your light. In bright sun, that's ISO 100. Overcast outdoor or open shade — ISO 400 to 800. Indoor with windows — ISO 800 to 1600. Indoor low light — ISO 3200 and up.
ISO is the variable I treat as least flexible at the start of a shoot. Set it, then leave it alone unless your aperture and shutter speed can't reach a balanced exposure. Bumping ISO is your last resort, not your first move.
Step 3 — Choose Aperture for Depth of Field
Ask yourself: do I want the background sharp or blurry?
- Blurry background, subject pop → f/1.8 to f/2.8
- Some context, mild blur → f/4 to f/5.6
- Most of the scene sharp → f/8 to f/11
Pick aperture based on creative intent, not exposure. You'll fix exposure with shutter speed in the next step. And remember — diffraction kicks in past f/11 to f/16 on most sensors, so don't reflexively reach for f/22 just because more depth sounds better.
Step 4 — Dial In Shutter Speed for Exposure and Motion
Now look at your in-camera meter. It shows a scale from -3 to +3. Adjust shutter speed until the indicator sits at zero (or where you want it).
If you can't get to zero without dropping below your handheld minimum (the reciprocal rule), you have two options: open aperture wider, or raise ISO. That's the trade-off cycle of the exposure triangle in action.
For moving subjects, ignore "balanced exposure" first and pick a shutter speed that freezes the motion. Then adjust aperture and ISO to balance.
Step 5 — Take a Test Shot and Read the Histogram
Don't trust the LCD preview. Screen brightness varies, ambient light fools your eyes, and what looks "good" on the back of the camera often isn't.
Look at the histogram instead. A well-exposed image typically has the bulk of the histogram in the mid-tones with no hard clipping against the left (pure black) or right (pure white) edges. If it's bunched against the left, you're underexposed — open aperture, slow shutter speed, or raise ISO. Bunched against the right — do the reverse.
✅ Manual Mode Quick-Start Checklist > > - [ ] Rotate the mode dial to M > - [ ] Set ISO based on available light (start at base ISO in daylight) > - [ ] Choose aperture for the depth of field you want > - [ ] Adjust shutter speed until the in-camera meter reads neutral (zero) > - [ ] Set white balance to match the light source > - [ ] Take a test shot and check the histogram > - [ ] Fine-tune one variable at a time until exposure and creative intent match
Manual Mode Settings by Scenario (Quick Reference Table)
These are starting points for common shooting situations. Use them as a baseline, verify with the histogram, then adjust.
!Manual mode settings reference table showing ISO, aperture, and shutter speed for portrait, landscape, action, low light, and astro scenarios
| Scenario | ISO | Aperture (f-stop) | Shutter Speed | White Balance |
|---|---|---|---|---|
| Portrait (outdoor, daylight) | 100–200 | f/1.8–f/2.8 | 1/250s+ | Daylight (~5500K) |
| Portrait (studio, strobes) | 100 | f/5.6–f/8 | 1/125s–1/200s | Flash (~5500K) |
| Landscape (daylight) | 100 | f/8–f/11 | 1/125s+ (tripod for slower) | Daylight (~5500K) |
| Action / Sports | 400–1600 | f/2.8–f/5.6 | 1/1000s–1/2000s | Daylight or AWB |
| Low Light (handheld) | 1600–6400 | f/1.8–f/2.8 | 1/60s–1/125s | AWB or Tungsten |
| Night / Astro (tripod) | 1600–6400 | f/2.8–f/4 | 15s–25s | Daylight or 4000K |
| Indoor Natural Light | 400–1600 | f/2.8–f/4 | 1/125s+ | AWB or Daylight |
| Indoor Artificial Light | 800–3200 | f/2.8–f/4 | 1/60s–1/125s | Tungsten or Custom |
| Macro | 100–400 | f/8–f/16 | 1/125s+ (tripod ideal) | Daylight or Flash |
Starting points only. Adjust based on actual light, subject behavior, your specific sensor's noise performance, and your lens's sharp aperture range.
⚠️ Warning — These Are Starting Points, Not Rules > > Every sensor handles high ISO differently. Every lens has its own sharpest aperture. Light varies enormously even within "indoor daylight." Always verify exposure with the histogram and adjust from the suggested starting point. The table tells you where to begin — it doesn't tell you where to land.
Using Your Light Meter and Histogram in Manual Mode
The histogram is a graph showing the distribution of brightness values across your image, from pure black on the left to pure white on the right. It's more reliable than the LCD preview because it shows actual tonal data instead of a screen rendering affected by display brightness and ambient lighting. If you only learn one tool in manual mode, learn this one.
Understanding the In-Camera Light Meter
The meter is the scale you see in your viewfinder, typically running from -3 to +3 stops. Zero is the camera's idea of "neutrally exposed." Your job is to decide whether to trust it.
There are three main metering modes:
- Matrix / Evaluative — averages the whole scene. Best general-purpose starting point.
- Center-Weighted — biases the center of the frame. Useful for portraits.
- Spot — reads a tiny area (usually around the focus point). Critical for backlit subjects, stage performers, or any high-contrast scene where averaging fails.
Here's the catch: the meter is calibrated to 18% gray (middle gray). Point it at a snow scene and it'll underexpose because it thinks all that white should be gray. Point it at a black tuxedo and it'll overexpose for the same reason. In those situations, manually override or use exposure compensation in a semi-auto mode.
Reading the Histogram for Accurate Exposure
!Three histograms showing underexposed, correctly exposed, and overexposed images side by side
The left edge of the histogram is pure black. The right edge is pure white. Tall bars = many pixels at that brightness level.
- Pushed entirely left = underexposure, lost shadow detail
- Pushed entirely right = overexposure, blown highlights (often unrecoverable)
- Spread across the middle = balanced exposure with full tonal range
There's no single "correct" histogram shape. A high-key portrait against white will skew right legitimately. A night scene will skew left legitimately. What you're watching for is clipping — data jammed against the far edges that can't be recovered later. Cambridge in Colour's histogram tutorial and Capture the Atlas's histogram guide both cover this thoroughly if you want to go deeper.
💡 Tip — Expose to the Right (ETTR) — A Pro Technique > > ETTR is the practice of intentionally placing your histogram as far right as possible without clipping highlights. The reasoning: digital sensors record more data in the bright tones than the shadows, so pushing exposure right (then pulling it back in editing) captures more usable data overall. ETTR only works when shooting RAW, and it requires careful highlight monitoring. It's a worthwhile technique once you're past the basics, but not where I'd start.
Setting White Balance in Manual Mode
White balance tells your camera what color "white" looks like under the current light. Get it wrong and your skin tones go orange (tungsten light) or blue (shade). Get it right and colors look natural.
!White balance Kelvin temperature chart showing color from tungsten warm orange to shade cool blue
The Kelvin scale runs from warm (low numbers, ~2700K) to cool (high numbers, ~8000K). Each light source has a rough Kelvin temperature, and your camera matches it.
| Preset | Approx. Kelvin Range | Best Used For |
|---|---|---|
| Tungsten / Incandescent | 2700–3200K | Indoor lamps, old-style bulbs |
| Fluorescent | 4000–4500K | Office lighting, some commercial spaces |
| Daylight / Sunny | 5000–5500K | Outdoor sun, midday |
| Flash | 5500–6000K | Strobes, speedlights |
| Cloudy | 6000–6500K | Overcast outdoor |
| Shade | 7000–8000K | Open shade on a sunny day |
| Auto (AWB) | Variable | Most everyday situations |
| Custom / Kelvin | Manual entry | Studio, mixed light, creative grading |
Kelvin values vary slightly between camera manufacturers, but these ranges are close enough to work with.
💡 Tip — AWB + RAW Is a Perfectly Valid Workflow > > Modern auto white balance is genuinely accurate in most lighting. If you shoot RAW, you can adjust white balance non-destructively in Lightroom or Capture One after the fact. Manual white balance is most valuable when you need consistency across a sequence (product photography, event coverage where you want all the wedding reception shots to match) or when you're doing intentional creative color grading. Don't let anyone tell you AWB is amateur. It's a tool, and a good one.
Manual Mode on Mirrorless Cameras: Features That Make It Easier
!Mirrorless camera electronic viewfinder showing live exposure preview in manual mode
Mirrorless cameras have made manual mode dramatically more approachable than it was on DSLRs. The electronic viewfinder (EVF) shows you a real-time simulated preview of your exposure before you even press the shutter, so you can see whether your settings will produce a dark, bright, or balanced image. Combined with focus peaking and live histograms, the trial-and-error loop that defined the DSLR era is mostly gone.
💡 Tip — Turn On Exposure Preview Mode > > On most mirrorless bodies, you'll find an option called "Exposure Preview," "Live View Boost," "Setting Effect," or similar in the viewfinder or display menu. Make sure it's set to show effect of settings (not "always bright"). When enabled, the EVF darkens or brightens to match what your photo will actually look like. This single setting cut my manual-mode learning time by more than half.
Electronic Viewfinder (EVF) Exposure Simulation
A DSLR's optical viewfinder shows you what the lens sees — but at its native brightness, not how the sensor will record it. You have to take the shot, look at the LCD, and iterate. A mirrorless EVF shows you the simulated final image. If it looks too dark in the EVF with your current settings, your photo will be underexposed. Adjust before you press the shutter.
This is genuinely a big deal for beginners. The traditional advice "shoot, chimp the LCD, adjust" becomes "see, adjust, shoot."
Focus Peaking for Manual Focus Accuracy
Focus peaking overlays colored highlights (usually red, yellow, or white) on the edges of areas that are in focus. It's useful when you're using vintage manual lenses, doing video work where autofocus hunts, or shooting macro where autofocus often misses.
Enable it in your display or focus menu. Most mirrorless cameras let you pick the color and sensitivity. I run mine on red, high sensitivity, which makes manual focus on adapted lenses fast and reliable.
Manual Mode with Auto ISO: The Modern Hybrid Workflow
Yes, you can use Auto ISO in manual mode — most modern cameras support it. You lock aperture and shutter speed to control depth of field and motion, and the camera varies ISO automatically to keep exposure balanced. It's the go-to workflow for wedding, event, and wildlife photographers who shoot in unpredictable light.
⚠️ Warning — Set a Maximum ISO Limit > > When you turn on Auto ISO in manual mode, the camera will happily climb to ISO 25600 or higher if the light demands it. On most cameras, that's well past the point of usable image quality. Dig into your menu, find the Auto ISO Maximum setting, and cap it at a value that gives you acceptable noise on your specific sensor. For my Sony bodies, that's around ISO 6400. For older crop-sensor cameras, it might be ISO 1600. Test yours.
How Manual + Auto ISO Works
You set the aperture (say f/2.8 for shallow depth of field). You set the shutter speed (say 1/500s to freeze motion). The camera handles ISO. When light brightens, ISO drops. When light dims, ISO rises. Your creative variables stay locked.
Most cameras also let you set a minimum shutter speed when Auto ISO is engaged in semi-auto modes — useful in Aperture Priority but mostly redundant in full manual where you've already locked the shutter.
This is the workflow I default to for wedding ceremonies, where I'm shooting at f/2.8, 1/250s, and ducking under windows where the light changes by three stops in two seconds.
When to Use and When to Avoid the Hybrid Approach
Use it when:
- Light is changing rapidly (ceremonies, golden-hour wildlife, dance floors)
- You can't afford to miss a moment adjusting settings
- You're moving between bright and shadow within the same sequence
Avoid it when:
- You're in a studio or stable-light environment and want identical exposures across shots
- You're doing panorama stitches or focus stacks (consistency matters more than convenience)
- Your ISO cap and the light situation will conflict, leading to underexposed frames
Full manual (no Auto ISO) gives you total predictability. Manual + Auto ISO gives you reactive flexibility. Pick based on how unpredictable your light is.
When to Use Manual Mode — and When to Skip It
Manual mode isn't always the right tool. Here's the honest breakdown:
Manual mode is ideal when:
- Light is stable (studio, landscape on a tripod, astro)
- You need identical exposures across a sequence (panorama, bracket, focus stack)
- You're learning the craft and want to internalize the exposure triangle
- You're overriding a meter that's getting fooled (snow, backlit, stage)
Consider Aperture or Shutter Priority when:
- Light is changing fast and reaction speed matters
- You're shooting events, street, sports, or wildlife
- You want speed without giving up creative control of one key variable
- You're shooting video with smooth auto-exposure transitions
💡 Tip — No Mode Is Objectively Better > > Manual mode does not produce better photos by default. Aperture Priority with exposure compensation can deliver identical exposures and often beats manual on timing. The best photographers I know use whatever mode gets the shot reliably. The mode dial is a tool, not a moral test.
Best Situations for Full Manual Mode
- Studio photography with constant artificial light or strobes
- Landscape or architectural work on a tripod
- Astrophotography and long-exposure night photography
- Multi-image panoramas, brackets, or focus stacks
- Learning the craft (manual forces you to understand cause and effect)
When Semi-Auto Modes May Serve You Better
- Fast-moving events where light shifts unpredictably (weddings, street, sports)
- Casual photography where speed matters more than consistency
- Video with smooth auto-exposure transitions
- Any situation where Aperture Priority with exposure compensation gets you the result you want — don't force manual for its own sake
Troubleshooting: Fixing Common Manual Mode Problems
When your manual mode shots don't look right, it's almost always one of a handful of issues. Run through this diagnostic table before second-guessing your gear.
| Problem | Likely Cause | Fix |
|---|---|---|
| Image is too dark | Aperture too narrow, shutter too fast, or ISO too low | Open aperture (lower f-number), slow shutter speed, or raise ISO |
| Image is too bright | Aperture too wide, shutter too slow, or ISO too high | Stop down aperture, speed up shutter, or lower ISO |
| Subject is blurry (motion blur) | Shutter speed too slow for subject movement | Increase shutter speed to 1/500s+ for moving subjects |
| Image is blurry (camera shake) | Shutter speed below reciprocal rule, no stabilization | Use 1/focal length minimum; turn on IBIS/OSS; brace or use tripod |
| Image is too grainy / noisy | ISO too high for sensor | Lower ISO; open aperture or slow shutter to compensate |
| Background not blurry enough | Aperture too narrow, or you're too far from subject | Use wider aperture (f/1.8–f/2.8); get closer to subject; use longer focal length |
| Background too blurry | Aperture too wide for the scene | Stop down to f/4–f/8 to bring more into focus |
| Part of the image out of focus | Depth of field too shallow or wrong focus point | Stop down aperture; check focus point placement; refocus |
Free Manual Mode Photography Cheat Sheet
!One-page manual mode photography cheat sheet summarizing ISO, aperture, shutter speed, and white balance for beginners
📥 Download the Free Cheat Sheet > > Grab the one-page printable cheat sheet that pulls everything in this guide into a single reference you can save to your phone or print and stick in your camera bag. It covers ISO ranges by light condition, an f-stop guide with depth-of-field descriptions, a shutter speed motion chart, white balance presets, and the 6-step manual mode workflow. I keep a laminated copy in my camera bag and I've been shooting professionally for eight years. Don't be too proud to use one.
What the Cheat Sheet Covers
- ISO guide — lighting condition matched to recommended ISO range
- Aperture guide — f-stop values matched to depth-of-field effect and use case
- Shutter speed guide — speed ranges matched to motion effects and common subjects
- White balance presets — with approximate Kelvin ranges
- The 6-step manual mode workflow — numbered, in order
- Common starting settings — for portrait, landscape, action, and low-light scenarios
Manual Mode Photography: Frequently Asked Questions
What is manual mode in photography?
Manual mode (M) is a camera setting that gives you full independent control over ISO, aperture, and shutter speed. The camera doesn't override or adjust any setting automatically, which means you have complete control over exposure, depth of field, and motion rendering. It's the most predictable and repeatable way to shoot.
What are the best manual mode settings for a beginner to start with?
A reliable daylight starting point is ISO 100, f/5.6, then adjust shutter speed until the in-camera meter reads zero. That combination gives moderate depth of field, plenty of available light, and a predictable exposure baseline. Take a test shot, check the histogram, and adjust one variable at a time from there.
When should I use manual mode instead of Aperture Priority?
Use manual mode when light is consistent and you need identical exposures across a sequence — studios, landscapes on a tripod, panorama stitches, brackets. Use Aperture Priority when light is changing fast and you need to react quickly without losing depth-of-field control. Neither is objectively better; they're tools for different jobs.
What ISO should I use in manual mode?
Start at your camera's base ISO (commonly 100 or 200) in good light to minimize noise. Increase ISO only when you've maxed out aperture and shutter speed adjustments and still can't get a balanced exposure. Run a personal ISO noise test on your specific camera to find your acceptable upper limit — it varies dramatically between models.
How do I get a sharp photo in manual mode?
Use a shutter speed at or above the reciprocal of your focal length as a handheld minimum (1/50s at 50mm, 1/200s at 200mm). Factor in image stabilization, which can allow 2 to 4 stops slower than the reciprocal rule. For moving subjects, increase shutter speed further — 1/500s or faster — to freeze the motion.
Can I use Auto ISO in manual mode?
Yes. Most modern cameras support Manual + Auto ISO, where you lock aperture and shutter speed manually and let the camera vary ISO to maintain correct exposure. Set a maximum ISO cap in your menu to keep noise under control. This hybrid workflow is favored by event, wedding, and wildlife photographers shooting in changing light.
Why are my manual mode photos too dark or too bright?
Too dark usually means your aperture is too narrow, your shutter speed is too fast, or your ISO is too low for the available light. Too bright is the opposite — wide aperture, slow shutter, or high ISO. Check the histogram after each shot rather than relying on the LCD preview, and adjust the variable that gives you the result you want without sacrificing depth of field or motion sharpness.
Is manual mode better than auto mode?
No. Manual mode offers more creative control and exposure repeatability, but it's not universally better than auto or semi-auto modes. Auto and Aperture/Shutter Priority can produce excellent results, especially when light changes quickly or when you need to shoot fast. Manual mode is a tool for intentional, consistent photography — not a universal upgrade.
Sources
- How to Use Manual Mode — Photography Life
- How to Shoot in Manual Mode: A Cheat Sheet for Beginners — Digital Photography School
- Understanding the Exposure Triangle — B&H Explora
- Understanding Depth of Field: A Real-World Guide — DPReview
- All About the Sunny 16 Rule — PetaPixel
- Understanding Histograms in Photography — Cambridge in Colour
- Understanding ISO Sensitivity — Nikon USA
- What Is Aperture? — Sony
- The Diffraction Problem — LensRentals Blog
- How to Read a Histogram in Photography — Capture the Atlas